

I saw these really cute, seemingly easy to make Marbled Ring Dishes on A Beautiful Mess. I put my own spin on these by skipping the marbling and adding some kitty ears!* I like to have a ring dish in the kitchen so I can safely ditch them before getting into dishes or wrist deep in some raw meat. You know, the usual...
I found working with clay took some getting used to, even this easy polymer clay. I'm not really good with clay though so this might be a personal experience. I encountered lots of bubbles and trouble creating a smooth surface. I'll talk you through what I learned.
I used plain white Sculpy III from the craft store. The other tools I used were a nice sharp X-Acto knife, a 3" circle cutter (could easily be substituted with a 3" paper circle cut out), waxed paper, a small oven safe dish, paint brushes, Martha Stewart satin craft paint in 'Wedding', Martha Stewart Liquid Gilding in gold, DecoArt Triple Thick Gloss Glaze, sand paper and a little plastic scraper used for cleaning dishes.

I strongly recommend rolling the clay out on waxed paper or the shiny side of freezer paper. It's almost impossible to peel up a shape without warping it otherwise. Roll out your clay smooth as you can on a smooth surface covered in waxed paper.

I used a 3" pastry cutter to gently press a circle into the clay. Not all the way through since we want to add some ears to this dish.

I used the X-Acto knife to score the ears on. If one wasn't right I just smoothed the clay over with my finger and drew it again.
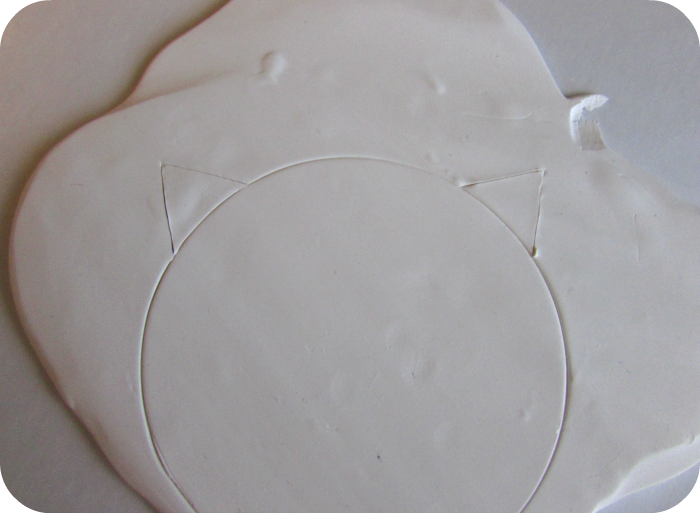
Once you like the ears, gently use the knife to cut around the circle line and around the ears. Try to keep a nice 90° edge. I used the plastic scraper to touch up any wonky edges.

Smooth the scores over the ears out!

Peel the circle off the waxed paper. This clay is quite soft and I found it very hard to handle it without getting a single finger print. I used the smooth side that was against the waxed paper as the front bowl part of the dish.

Very gently press the disk into a small dish. Push down in the middle to create a slight bowl shape. The ears were a little damaged during this process, but only on the back. Maybe a paper piece wedged behind them would save them from the dish. You only cook this at 275°F, so paper will not burn at that low temp.

Bowl-ed to my liking! Put this in a baking dish or tray and bake for 20 minutes at 275°F or according to your package instructions. Remove and let cool in the bowl.

You can see here my ears got a dent from the edge of the dish, darn! But don't worry, this clay is able to be sanded, so we can touch up some small imperfections that way!

I used some fine sand paper to smooth down the whole thing, minus the hard edges around the outside. I wanted to keep those nice and crisp!

Ears look better after sanding yes!?

I also rubbed the bottom on sand paper until it flattened out, making the dish less tippy.

I decided to paint the dish white even though the clay was white. A few imperfections had gotten into the clay and I wanted to cover them up!

I used about two coats on the top and just one on the bottom. Another benefit of sanding is that paint adheres better.

Another tricky part was to gild the edges of the dish. It's hard to stay in the lines! Remember if you use this gilding to shake it up a lot before use. The gold sinks to the bottom.

Yikes, I got some gold on the top of the dish.

Sandpaper to the rescue again. I just lightly sanded the mistakes off the top.

The bottom was another story, way too much to just sand it off.

Bam. How about painting the whole bottom gold?!

Tada! This is after the gilding has dried over night and the whole thing was coated in one layer of the triple thick glaze. The glaze will protect the clay from stains in addition to adding a shine.

The nice gold bottom was a good choice.


*So yesterday I was on Design Sponge and noticed in their '20 Gifts under $25' a very similar dish. Catbird makes a ring dish almost just like this. What a coincidence. And here I was thinking I was being all clever making something I hadn't seen available. Aw well, great minds??
No comments :
Post a Comment